Showing posts with label Project Quilting. Show all posts

Thursday, February 22, 2024

Hourglass Quilt Block Cards - Project Quilting


Hourglass quilt square cards, 4" x 6", made by Pam Geisel for Project Quilting, Season 15, Challenge 4: Hourglass

Recap for "Hourglass":

You must use an hourglass SHAPE in your project, but you do not have to use the exact hourglass BLOCK.

It's a busy week; between work and a custom quilt, and an upcoming workshop, I knew it was going to have to be a small project. I was interested in how the Hourglass quilt block would work with a striped fabric and the only stripe from my stash that spoke to me this week was a rainbow stripe. 

I used the Scrapish.com Hourglass tutorial which is very easy and yields two complete squares, although that meant one of the stripes was going horizontal (which was what I was envisioning) and the other has the stripes going vertical (and also lining up) which I think helps reinforce the concept of an hourglass. I used the rainbow dot fabric because I thought it was fun: it was a complement to the colors in the stripe but a contrast in the shapes.

For this week I made four quilt block square cards. Usually the quilt squares that I make for my cards are either Pinwheel variations, Nine Patch, or occasionally Four Patch, but I think I will make more of the Hourglass squares using stripes.

Be sure to check out the other creative interpretations on the Hourglass block at the Project Quilting page.

More about Hourglass Quilt Square Cards

= = =

Click on any of the photos to see larger images.

Read more about Project Quilting

To see other entries for this challenge, visit the Hourglass page.

Tuesday, February 6, 2024

In the Garden of My Heart - Project Quilting


"The Garden of My Heart" 16" x 9", made by Pam Geisel for Project Quilting, Season 15, Challenge 3: Inside Out

Recap for "Inside Out": 

Some part of your project must thematically or literally be inside out.

As I was thinking about this challenge, I remembered my art quilt "Life is Like a Box of Chocolates," where I took a quilt that was already quilted and cut it into 5" squares and machine raw-edge appliqued those squares to the background in a different arrangement leaving the batting visible on the sides. I also remembered that I had a piece that I'd started for Project Quilting's 2015 "Focus Through the Prism" challenges that was pieced and quilted but didn't work out the way I wanted to, so I cut it up and made some quilted postcards for later Project Quilting Challenges including two Modern Art Postcards and two 3D Flying Geese pieces that ended up being framed.

I was down to just a few pieces but I was able to cut out five hearts (sorry, it's hard to see the hearts that I traced on to cut around).


So this is two ways this piece is "Inside Out" because the hearts were previously quilted with batting, the batting shows around the edges and because the heart is an organ that's supposed to be on the inside.


To keep with the inside out theme, some of the pink fabrics piece for the background show the wrong side of the fabric (a technique I utilized back in season 2 with "Sometimes I Dream of Flying" because I didn't have enough green options...and a side note, I once bought a commercially made sundress partially because it had the wrong side of the fabric facing out). I also created the quilt backwards by quilting and binding with a facing before I started adding the flower hearts on the stems.


Here you can see the batting at the edge of the heart.


There's a yellow/green/blue variegated ribbon sewn on top of the stems and also framing the piece. Green heart-shaped are used for the leaves, and there are also two pink heart-shaped buttons on two of the flowers, and four smaller red heart-shaped buttons in the four corners.

More about In the Garden of My Heart

= = =

Click on any of the photos to see larger images.

Read more about Project Quilting

To see other entries for this challenge, visit the Inside Out page.

Sunday, January 28, 2024

Lavender Haze - Project Quilting


"Lavender Haze" art is 5" x 7", frame is 7" x 9", made by Pam Geisel for Project Quilting, Season 15, Challenge 2: Sky Color

Recap for "Sky Color":

Take inspiration from the colors of the sky, but exclude or use less than 10% of the usual blue.

I've made many quilts with skies, including some that weren't blue. On piece that I made for a Project Quilting Off Season Challenge was even titled "Red Sky at Night."

Pretty much all week here in southwestern Ohio, the sky has been gray. And while I don't have anything against the color gray, I prefer my skies to have more colors. I had several things that kept me from even really thinking about this challenge until the end of the week and no sudden inspirations until I looked into my kitchen cabinet and saw this mug.

Last summer we went on vacation to the west coast, and one of the places we stayed was Orca's Island which is on the western edge of Washington State, practically in Canada. We were fortunate to be there for their Solstice Parade which was very cool. Another cool thing was the Orca's Island Pottery where they have an amazing tree house and lots of pottery. My husband bought a mug. Our two friends who we were with each bought a mug. Bowing to peer pressure, I also selected a mug, the one shown, and I just love the colors. When I saw it in my cupboard, I realized they are sky colors, so I used this for my inspiration for this week, although I flipped the purples so the darks were at the top. I also eliminated the blue and focused more on the pink tones.


I call these small framed pieces Fabric Mosaics, and I haven't made one since 2019. I take small pieces of fabric, arrange them, fuse them down, cover with a piece of sheer tulle, then quilt everything in place.


In this one I added a few pieces of colored sheer fabrics beneath the larger piece and also added a round shell and some extra tulle on top. I hand stitched around the "moon" with some white embroidery floss.


I also couched a piece of yarn on top of the tulle and added some small pink pre-embroidered flowers with seed beads in the center.

More about Lavender Haze


= = =

Click on any of the photos to see larger images.

Read more about Project Quilting

To see other entries for this challenge, visit the Sky Colors page.
Sunday, January 14, 2024

Rainbow Pinwheel Birdhouse - Project Quilting


"Rainbow Pinwheel Birdhouse" 8" x 10", made by Pam Geisel for Project Quilting, Season 15, Challenge 1: Bird House


Recap for "Bird House":

Use the inspiration of a bird’s house for your project.

It's time again for Project Quilting...this is the 15th year! A little recap by the numbers:
  • 729 quilts I've made to date
  • 268 (almost 40%) of these are art quilts
  • 80 (just over 10%) have been made for Project Quilting
  • 9 of these quilts have had a bird on them (including 3 PQ quilts: "Sometimes I Dream of Flying," "Louie," and "Tweet Dreams")
  • 1 framed fabric mosaic (not a PQ piece) had a bird's nest on it ("Home Tweet Home")
And for PQ 4.4 "Wish Upon a Star" I made a birdhouse ("Make a Little Birdhouse in Your Soul." After making that piece I made 15 more birdhouses!

I wasn't sure if I wanted to make another bird house for this challenge so I considered lots of other bird's houses but nothing was really speaking to me until I came across a photo of a quilt that was made of brightly colored pinwheels.


Now the Pinwheel block is probably my favorite block and I love the other patterns that develop when pinwheels are placed next to each other. But what I saw in this photo was that a birdhouse could be made using a pinwheel block for the bottom with the pointy part made from part of a pinwheel block above it.


I embellished it with multi-colored zig zag band for the roofline and colorful buttons that were shaped as both stars and hearts.


And the backing fabric? Birds of course!


A dozen other birdhouses. More about these are on my blog.

= = =

Click on any of the photos to see larger images.

Read more about Project Quilting

To see other entries for this challenge, visit the Bird House page.
Wednesday, March 15, 2023

DragonFlight - Project Quilting


"DragonFight" 6" x 6", made by Pam Geisel for Project Quilting, Season 14, Challenge 6: Conquer a Fear


Recap for "Conquer a Fear":

Your project must involve conquering something that scares you.

OK, so I'm not scared of dragonflies. I'm not really fond of bugs in general, so I thought I'd start with baby steps and focus on an insect that I'm OK being around, and maybe when I encounter the insects that I don't like as much, I'll be able to see the similarities it has to a dragonfly.


I used the same gray sheer fabric for the dragonfly's wings that I used for the bee's wings in "Bee Kind" and the prism in "Breaking Light."


The background is a lovely batik that has greens and purples in it. I thought it looked like flowers in a garden that are out of focus because they're in the background. I also couched a piece of purply yarn along the bottom to add even more visual (and literal) texture.

It's wrapped around a canvas frame.

More about DragonFight

= = =

Click on any of the photos to see larger images.

To read more about Project Quilting, go here.

To see other entries for this challenge, visit the Conquer a Fear page.
Thursday, March 2, 2023

Kaleidoscope Table Runner and Placemats - Project Quilting

 
"Kaleidoscope Table Runner" 36" x 16", made by Pam Geisel for Project Quilting, Season 14, Challenge 5: Sew Not a Square

Recap for "Sew Not a Square":

You may use no square shapes in your project.

If you look at the quilts on my website, at least half of them are square. But quilts lend themselves to the share shape. The designs are called "quilt squares" even. But I do sometimes make non-square quilts, including a few 3D art quilts, but something that lends itself well to rectangles are table runners. 

I had two large scale print fabric in my stash that told me they wanted to be made into a table runner, so I did. There was also enough fabric to make four placemats, which are also not square.

"Kaleidoscope Placemats" 12" x 16" each, also made by Pam Geisel for Project Quilting, Season 14, Challenge 5: Sew Not a Square

I was glad the fabric told me what it wanted to be as I don't use a lot of large scale prints in my art quilts and the fabric was really cool.


And the prints on the fabric are also not squares.


= = =

Click on any of the photos to see larger images.

To read more about Project Quilting, go here.

To see other entries for this challenge, visit the Sew Not Square page.


Friday, February 3, 2023

Bending Light - Project Quilting


"Bending Light" 6" x 6", made by Pam Geisel for Project Quilting, Season 14, Challenge 3: 54-40 or Fight

Recap for "54-40 or Fight":

Be inspired by and use the traditional 54-40 or Fight block.

This is the 54-40 or Fight block. It's kind of cool for a traditional block and depending on where you put your darks and lights it can look quite different. 

I played around with some ideas using the whole block but I was mostly inspired by just a small part of it. 

If you imagine the block as a tic-tac-toe board, then I chose just the middle part in the bottom row, which made me think of a prism, even though most prisms are triangles whose sides are all the same length and this triangle is taller than it is wide.

My angles of refraction might also be off, but this isn't science, it's art inspired by science. The physics behind light is cool!

The rainbow is pieced and then appliqued to the black background. The prism is made with two pieces of sheer fabric, one that has sparkles on it and the top one is a thicker gray sheer.

The white line is a white yarn and around the prism are two black yarns, one of which has some green sparkles in it.

It's wrapped around a canvas frame.

More about Bending Light

= = =

Click on any of the photos to see larger images.

To read more about Project Quilting, go here.

To see other entries for this challenge, visit the 54-40 or Fight page.
Wednesday, January 18, 2023

R is for Rabbit Baby Quilt - Project Quilting

"R is for Rabbit" 32" x 32", made by Pam Geisel for Project Quilting, Season 14, Challenge 2: Pink Tint

Recap for "Pink Tint":

Some shade of pink must dominate this week's project.

I've had this adorable pink fabric with funny rabbits on it for several months and I knew it was going to become a baby quilt. 


I paired it with four patches made in pastel colors of pinks, yellows, blues, and purples. The binding is the blue and blue checkerboard fabric, and although it's hard to see, I used a variegated pastel pink-yellow-blue thread for the quilting.

= = =

Click on any of the photos to see larger images.

To read more about Project Quilting, go here.
To see other entries for this challenge, visit the Pink Tint page.
Tuesday, March 15, 2022

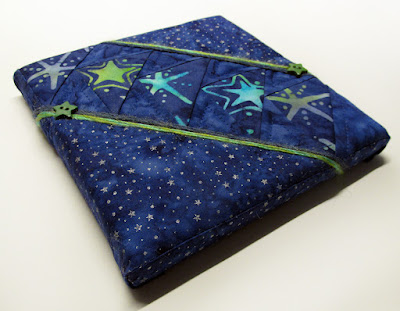
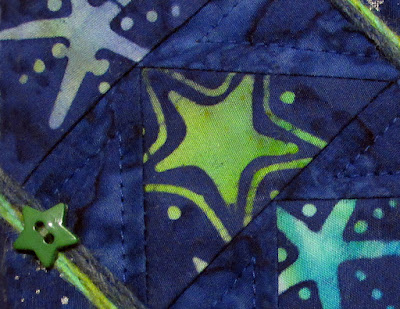
Shooting Starfish - Project Quilting


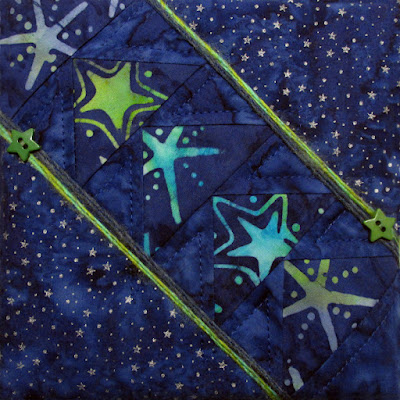
Shooting Starfish, 6" x 6 x .5", made by Pam Geisel for Project Quilting, Season 13, Challenge 6: Flying Geese

Recap for "Flying Geese":

Your project must include a minimum of 5 pieced flying geese blocks.

There are exactly 5 flying geese blocks in this piece, although because the corner blocks are a very similar color to the background of the starfish fabric, the blocks aren't easy to distinguish. Also the top left block is wrapped around the corner of the canvas, so it's also somewhat hidden.


I also couched two different colors of yarn along the block edges, a gray blue and a lime green. Then I added two lime green star buttons.


I've had the starfish fabric for several years and every time I open the batik fabric box, it would smile politely at me. I was planning something different for this piece but when I opened the fabric box this time, it called out to me so I dropped the previous fabric plans and went with this one.

More about Shooting Starfish

Click on any of the photos to see larger images.

To read more about Project Quilting, go here.

To see other entries for this challenge, visit the Flying Geese page.

Friday, March 4, 2022

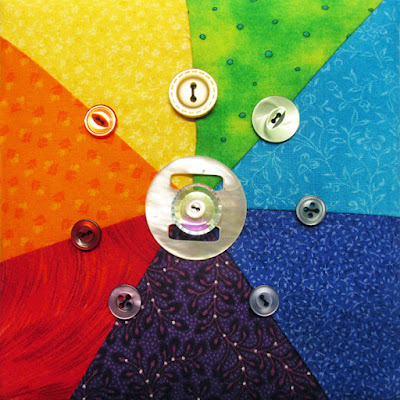
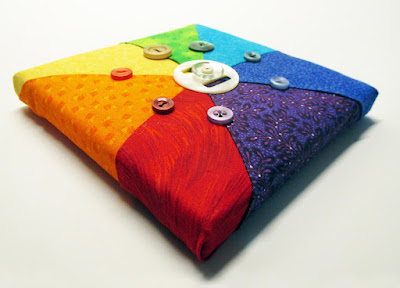
Ring Around the Rainbow - Project Quilting


"Ring Around the Rainbow," 6" x 6 x .5", made by Pam Geisel for Project Quilting, Season 13, Challenge 5: Rhythm and Repetition

Recap for "Rhythm and Repetition":

There must be something in your project intentionally repeated 3 or more times for visual effect.

For this week's project, I repeated the triangle shape seven times and the round shape (buttons) ten times (there are three buttons in the center).


The rainbow colored buttons are all semi-transparent. The largest button in the center is a shell button, the center one is opalescent, and the tiny center button is a semi-transparent white button.


The piece is wrapped around a small canvas frame.

More about Ring Around the Rainbow

Click on any of the photos to see larger images.

To read more about Project Quilting, go here.

To see other entries for this challenge, visit the Rhythm and Repetition page.

Saturday, February 19, 2022

What I Stand On Is What I Stand For - Project Quilting

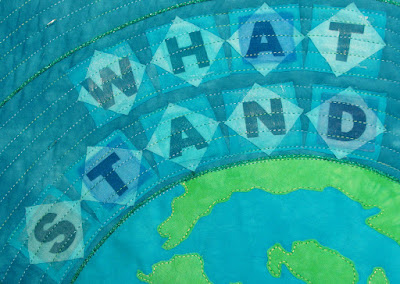
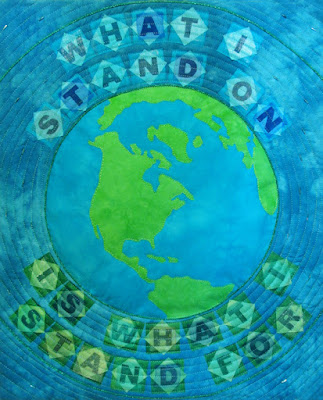
"What I Stand On Is What I Stand For," 17" x 21", made by Pam Geisel for Project Quilting, Season 13, Challenge 4: Mining for Diamonds

Recap for "Mining for Diamonds":

Use the diamond as your project inspiration. There are lots of ways to get there: combine triangles, split a rectangle, make inset seams, focus on the rhombus, use a quilt block that with the shape, or instead be inspired by the facets of a true stone.

Diamond gems are nice but mining for them can be controversial, and mining in general isn't always good for the planet, which inspired this piece and does include diamond shapes behind the letters (yes, I took the easy way out and used a square rotated on point).


I used all hand-dyed fabrics for this piece. The first thing I did was trace the reverse shape of the continents onto fusible webbing, fuse that to a piece of green fabric, cut it out, then sewed it to the blue oceans fabric with one piece of batting and no backing using a variegated blue green thread. I wanted the earth to push away from the background a bit so after that part was done I placed it on the backing fabric with some extra pieces of batting behind the earth then sewed it to the background only at the edges.


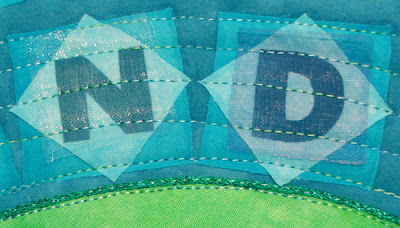
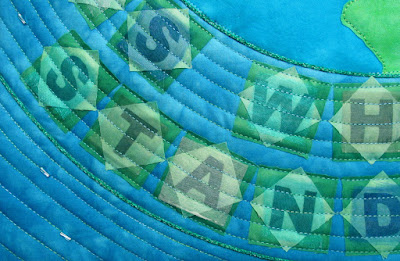
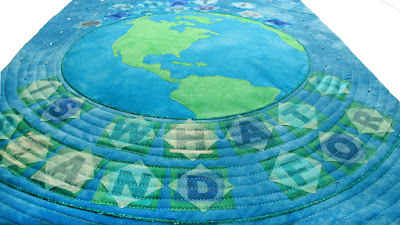
The letter blocks are layered fabric: a piece of square fabric on the bottom, a diamond shaped fabric, a fabric letter, with a piece of sheer fabric on top. The letters have fusible on the back (it makes them easier to cut) but the squares and diamonds don't as I wanted them to have a bit of dimension and not lay flat against the background.


Once the earth was in place I quilted a quilting line 1/4" from the edge of the earth and used that as a guide to place my letter blocks. I quilted the bottom part of the letter block on top of the quilting line I just sewed. Then I quilted the top of the blocks using the square as a guide. Next I quilted through the middle of the blocks using the points of the diamonds as a guide. Then I quilted the second and fourth lines trying to get them equally between the other lines.


I added a sparkly green cord around the earth and below the letters at the bottom and above the letters at the top and I hand sewed some blue bugle beads in the four corners and also on the left and right sides of the globe.

More about What I Stand On Is What I Stand For.

= = =

Click on any of the photos to see larger images.

To read more about Project Quilting, go here.

To see other entries for this challenge, visit the Mining for Diamonds page.


Thursday, February 3, 2022

Magic Wand - Project Quilting

 
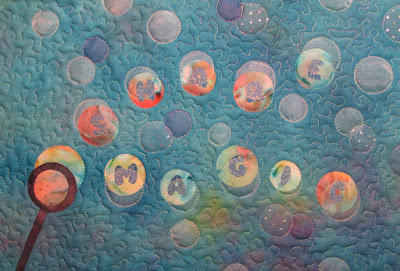
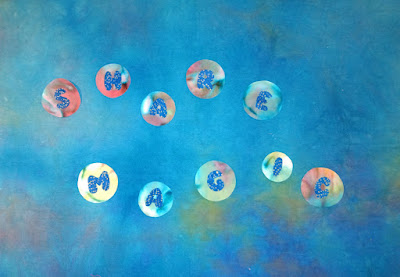
"Magic Wand," 19" x 13", made by Pam Geisel for Project Quilting, Season 13, Challenge 3: Kitchen Influence

Recap for "Kitchen Influence":

Use food and cooking as your inspiration.

I had several ideas for this week's challenge but what I settled on was soap bubbles. You know, from washing dishes after cooking. We don't have a dishwasher, and we're fine with that. It's just the two of us and we wash the dishes after every meal, so washing them is usually a quick chore. And sometimes I enjoy washing dishes because of the soap bubbles.


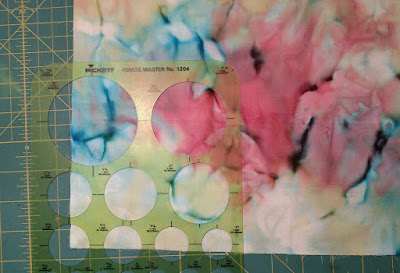
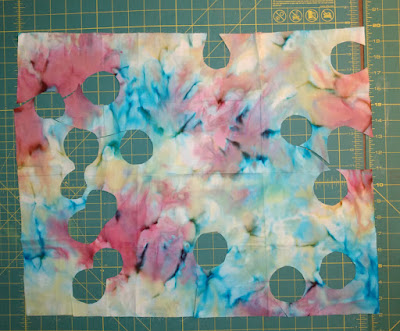
First I picked a multicolored batik fabric that had some interesting color patterns in it. I used my circle template ruler to find the spots that I wanted to use then ironed some fusible in that spot and then cut the circles out. I love this circle template and I use it often.


As you can see, I picked spots all over this piece of fabric. I don't really like doing this as I feel it's wasteful of the fabric but occasionally I find it's worth it.


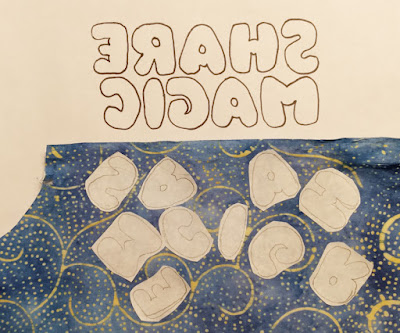
I made some bubble letters. When using fusible to make letters you want to trace them backwards. (If you can't read backwards or 'backwords', the letters spell out SHARE MAGIC.) So not a problem for the A, H, I, and M but it will make a difference with the other letters. I fused them on this fun batik print. I do like the swirly lines but I didn't want them to distract from the letters so I placed the letters to avoid the swirls. The little yellow dots on the blue background reminded me of fireflies.


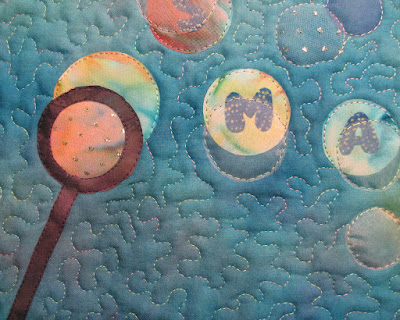
I fused the letters to the circles then fused them to this background fabric, a piece of hand dyed fabric that was mostly blue but you could see some other colors in it. They look a little lonely so I decided to add a bubble wand and some sheer circles as additional bubbles. Fusing sheer fabric is difficult (and if you get it the iron too hot the sheer will melt) so I pinned them in place. There were a lot of pins in it so I didn't take a photo of this stage.


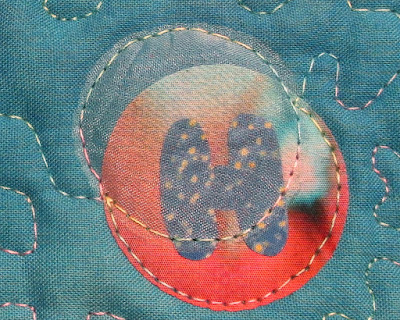
I used a shiny, variegated thread to quilt around the bubbles and some free motion quilting on the background between the bubbles.


I off set some sheer circles on top of the fabric circles so when I quilted the edge of the sheer it would catch part of the letters.


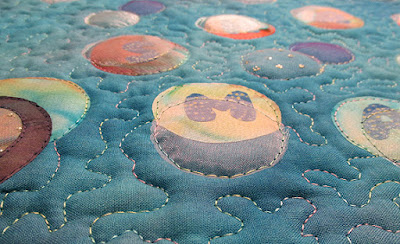
Here's a side view.

More about Magic Wand.

= = =

Click on any of the photos to see larger images.

To read more about Project Quilting, go here.

To see other entries for this challenge, visit the Kitchen Influence page.