Showing posts with label Project Quilting 2016. Show all posts

Saturday, March 19, 2016

Modern Art Postcards - Project Quilting

"Modern Art Postcards," 6" x 4" (each), made for Project Quilting, Season 7, Challenge 6: A Goose in the Monkey Wrench, Mar. 2016 in Yellow Springs, Ohio
Challenge recap for  "A Goose in the Monkey Wrench":  
For this challenge you must include at least one monkey wrench block and one flying geese block.  You may add other blocks if you wish.
I decided to make two postcards for this challenge, for two reasons. One is I've been working on a bed-sized custom quilt and that took most of my time. 
The second reason is since there two traditional quilt blocks were part of the Project Quilting Focus Through The Prism challenges, I thought it would be appropriate to use the same fabric we used for those challenges, and I mostly have small pieces of that fabric left.
Both postcards are 6" x 4" and had white fabric on the back where you can write a message and the address. And you can actually send these through the mail as they are! All of the edges are sewn down and are finished with a satin stitch using black thread.

Click on any of the photos to see larger images.

To read more about Project Quilting, go here.

To see other entries for this challenge, visit the A Goose in the Monkey Wrench link up.

Friday, February 19, 2016

African Safari Baby Quilt - Project Quilting

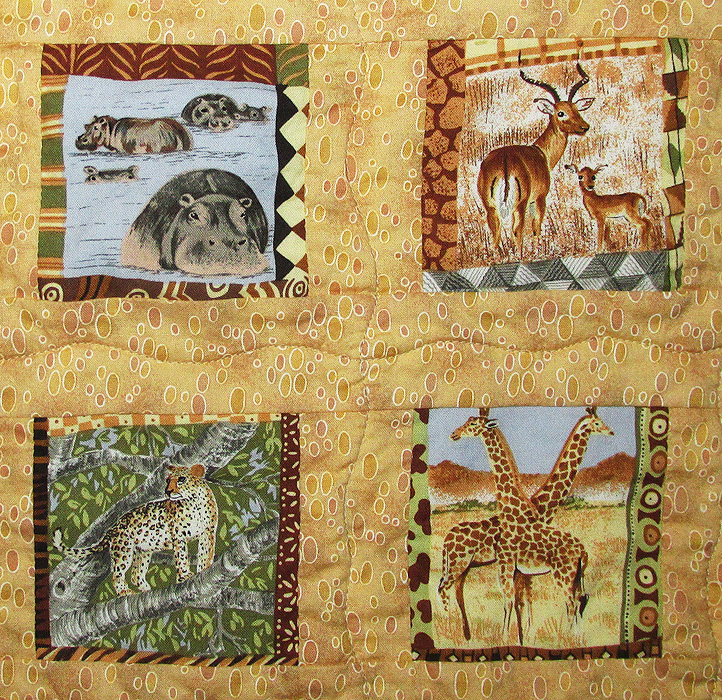
"African Safari" Baby Quilt, 29 x 33.5", made for Project Quilting, Season 7, Challenge 4: I Need a Vacation, Feb. 2016 in Yellow Springs, Ohio

Challenge recap for  "I Need a Vacation":
 
Vacation is the inspiration for this challenge. Use the way vacation makes you feel or the places you'd go or the transportation to get there. Anything vacation related that inspires you.


For my project, we're going on an African Safari. I actually have a small box of fabrics with safari animals printed on them. They are mostly small pieces, not a lot of yardage which is why it's a small box. There were 30 of these small animal prints that measured about 3" x 3". They have little printed quilt patterns on them.

I pieced them with a tan fabric with oval spots on it so that each animal box is separated by sashing. And I added a brown border then machine quilted wavy lines in the sashing.


The backing fabric is one print that has small safari animals floating on a brown background and larger ones in a row across the bottom.

= = =

Click on any of the photos to see larger images.

To read more about Project Quilting, go here.

To see other entries for this challenge, visit the I Need a Vacation link up.

Sunday, February 7, 2016

String Theory - Project Quilting

"String Theory," 16 x 16,made for Project Quilting, Season 7, Challenge 3: All About That Thread, Feb. 2016 in Yellow Springs, Ohio

Challenge recap for  "All About That Thread":
 
In honor of one of Project Quilting's long term sponsors, Aurifil, the inspiration for this week's challenge is THREAD.
Thread is obviously important for quilting. You use it for piecing and appliqueing a quilt top. You use it for the quilting. Plus adding the binding, sleeves and labels. Other than the quilting, it's usually not even visible.
I had a ton of ideas for making a quilt that features thread:
  • Making a whole quilt, which doesn't have any piecing or applique on the top and is just quilting. While these are lovely, I don't think my quilting skills (or patience) are up for this. 
  • Doing thread painting, where you use the sewing machine to apply stitches almost as if it's paint. I've done some of this before but haven't really enjoyed the process. It works well for feathers so I was thinking of making an owl or a rooster.
  • Making something like Ana Teresa Barboza's embroidery work where the thread hangs outside of the frame of the image. Not sure how this is even done, and somehow I don't think what I'd make would look like this.
  • The thread art where you wrap thread around nails in a board to create a design. But how to do this on fabric?
Wednesday evening I finally decided that I wanted to do something like the thread art, but using buttons with a shank (instead of holes on top) and wrapping thread around them. In order to do this, I needed some buttons so as I was driving to the store, the whole layout popped into my head.

The store only had 3 packs of cardigan buttons so I bought all three. Having a total of 30 buttons meant I could have 15 buttons on each side. If each button is 1" apart and we allow for room at the top and bottom, my piece would be 16" x 16".


I found a lovely piece of black marbled fabric and another that was a black on black tone and pieced them along with a multi-colored batik strip. I didn't want the batik strip going all the way to the edges so I pieced some black fabric on either side of it.

I made the quilt sandwich using some black batting. I haven't used it before and sometimes found I wasn't sure where the edge of the quilt top was when I was quilting. I quilted some random lines on angles.

I bound the quilt then used a white colored pencil to mark where the buttons will go, then added the buttons.


Instead of thread I used embroider floss in the colors of the batik strip. Instead of wrapping the thread around the buttons, I threaded the floss and went through the hole in the button shanks.


Unlike the thread art with the nails in the wood, this wasn't stiff. After I was finished I cut open the backing behind the thread and added a piece of thick fusible interfacing. If I did this again, I'd add that part during the sandwiching process.

The last thing I did was couch a piece of variegated yarn just inside the binding.

More about Sting Theory


= = =

Click on any of the photos to see larger images.

To read more about Project Quilting, go here.

To see other entries for this challenge, visit the All About That Thread link up.

Wednesday, January 20, 2016

Learning To Fly - Project Quilting

"Learning To Fly," 13" x 20", made for Project Quilting, Season 7, Challenge 2: Seasons, Jan. 2016 in Yellow Springs, Ohio

Challenge recap for  "Seasons":
 
Your inspiration for this challenge is seasons. You can choose one season or all of them. Or pick another meaning of seasons, maybe seasons of life.

I spent far too much time thinking about this challenge. I think I was trying to hard, trying to make this piece something that it's not. Once I realized that, it became easier. I decided to something Springy, perhaps because I'm already over Winter this year.

I started with a piece of hand dyed fabric that made me think of the sky. It already had fusible on the back so I fused it to a piece of batting, added a backing fabric, and started by quilting these pieces together.


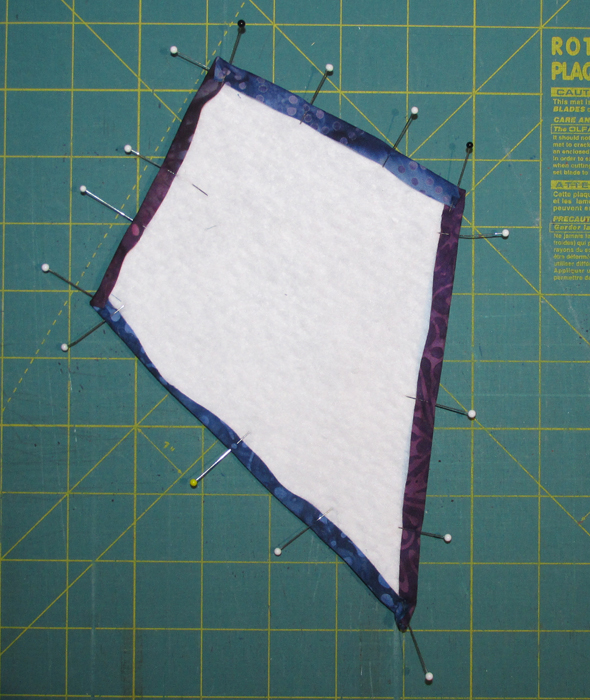
Then I cut some paper to figure out what size I wanted the kite to be, then I made a paper template (adding the 1/4" seam allowance) and pieced the kite. 


I fused it to a piece of batting, folded the 1/4" edges over, then quilted it in place. I added the couched black yarn for the kite string and the couched fun fur yarn for the kite's tail.


For the ties on the tail I cut some batik fabrics to 1.5" x 5". I laid them out lengthwise and folded the top and bottom edges so they met in the middle (now measuring .75" x 5"). I folded that in half lengthwise (now measuring .375" x 5") so the raw edges were now in the middle. I could have sewn tubes for this part but I wanted the look of hand tied fabric.

I tied these pieces so there was a knot in the middle and trimmed them a little bit. I hand-sewed them in place on the kite tail.


I thought it needed something more so I added the three small kites in the background. I didn't want them to draw too much attention so I kept them in the blue family and made them pretty small. I quilted their kite strings with black thread and for the tails I left the thread I used to applique them down with.


I made a pieced border using batik fabrics then couched more of the fun fur along that edge.

More about Learning to Fly


= = =

Click on any of the photos to see larger images.

To read more about Project Quilting, go here.

To see other entries for this challenge, visit the Seasons challenge link up.

Saturday, January 9, 2016

Confetti is Good for the Soul - Project Quilting

"Confetti Is Good For The Soul," art is 4.5" x 3" in a 7" x 5" frame, made for Project Quilting, Season 7, Challenge 1: Confetti, Jan. 2016 in Yellow Springs, Ohio

Challenge recap for  "Confetti":

Your inspiration for this challenge is confetti.

For this project I decided to use the confetti technique that Noriko Endo made popular. For this technique you use very tiny pieces of fabric that are piled up, covered with netting, and then quilted down. One of my on-line quilting friends, Sally Manke, also uses this technique to make her award-winning art quilts.

This is not a technique that I'm fond of, mostly because it's really hard to control and make those tiny pieces stay where you want them long enough to quilt them down. And because I was out of town most of this week, I knew my piece would end up being pretty small.


More about Confetti is Good for the Soul


= = =

Click on any of the photos to see larger images.

To read more about Project Quilting, go here.

To see other entries for this challenge, visit the Confetti challenge link up.

Sunday, December 27, 2015

Project Quilting Season 7

It's time for Project Quilting's seventh season! It's a three month on-line event that challenges participants to create a quilt in one week, with a week off in between. You can participate in as few or as many as you like. Participants are automatically entered into random prize drawings and at the end of the season there will be grand prizes awarded to all participants, with one entry per challenge quilt, so the more challenges you enter, the better your chances for winning.

The schedule for 2016 is:
Challenge 1: January 3
Challenge 2: January 17
Challenge 3: January 31
Challenge 4: February 14
Challenge 5: February 28
Challenge 6: March 13

Each challenge is posted at noon CDT and due exactly one week later at noon CDT.

The challenge will be posted on the "Persimon Dreams" Project Quilting blog and you can also find links about past seasons there. Still have questions? If so, check this out.