Saturday, February 19, 2022

What I Stand On Is What I Stand For - Project Quilting

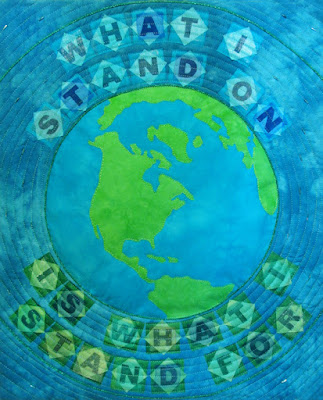
"What I Stand On Is What I Stand For," 17" x 21", made by Pam Geisel for Project Quilting, Season 13, Challenge 4: Mining for Diamonds

Recap for "Mining for Diamonds":

Use the diamond as your project inspiration. There are lots of ways to get there: combine triangles, split a rectangle, make inset seams, focus on the rhombus, use a quilt block that with the shape, or instead be inspired by the facets of a true stone.

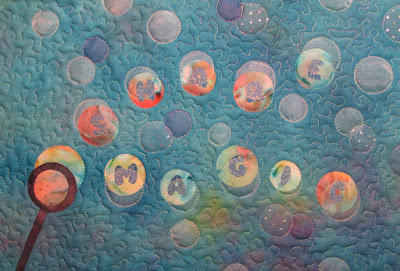
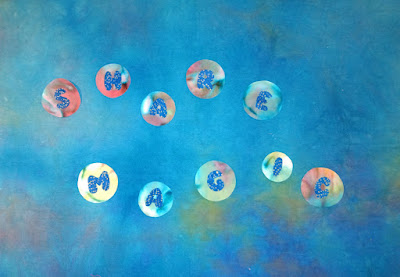
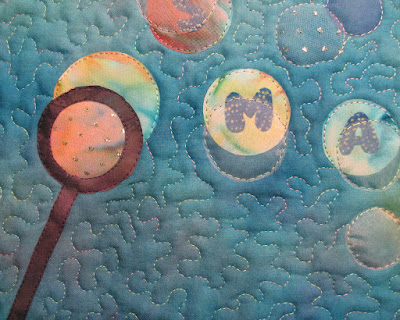
Diamond gems are nice but mining for them can be controversial, and mining in general isn't always good for the planet, which inspired this piece and does include diamond shapes behind the letters (yes, I took the easy way out and used a square rotated on point).


I used all hand-dyed fabrics for this piece. The first thing I did was trace the reverse shape of the continents onto fusible webbing, fuse that to a piece of green fabric, cut it out, then sewed it to the blue oceans fabric with one piece of batting and no backing using a variegated blue green thread. I wanted the earth to push away from the background a bit so after that part was done I placed it on the backing fabric with some extra pieces of batting behind the earth then sewed it to the background only at the edges.


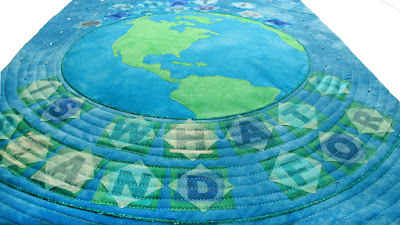
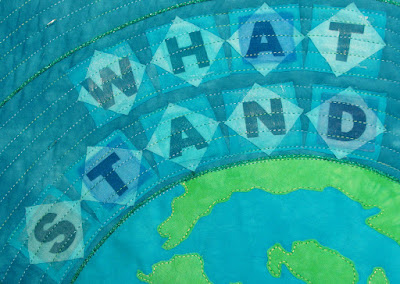
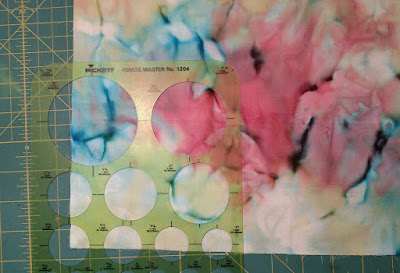
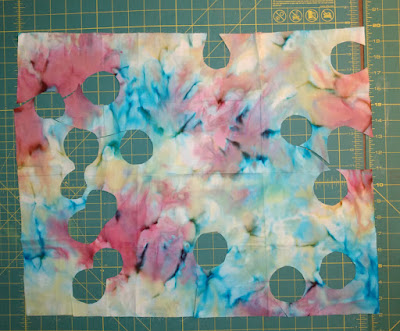
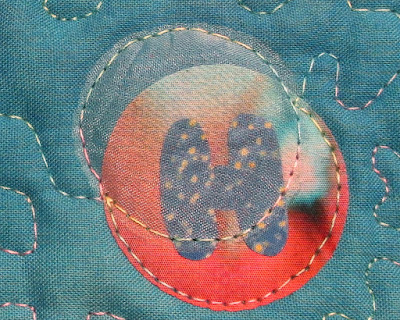
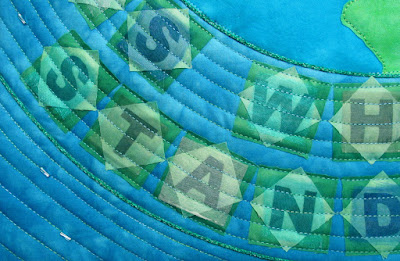
The letter blocks are layered fabric: a piece of square fabric on the bottom, a diamond shaped fabric, a fabric letter, with a piece of sheer fabric on top. The letters have fusible on the back (it makes them easier to cut) but the squares and diamonds don't as I wanted them to have a bit of dimension and not lay flat against the background.


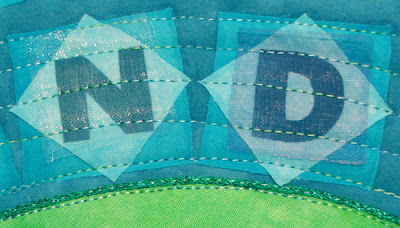
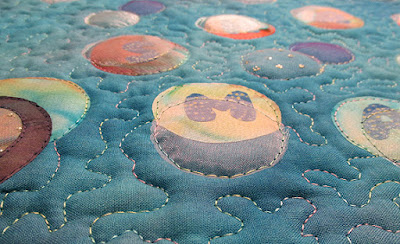
Once the earth was in place I quilted a quilting line 1/4" from the edge of the earth and used that as a guide to place my letter blocks. I quilted the bottom part of the letter block on top of the quilting line I just sewed. Then I quilted the top of the blocks using the square as a guide. Next I quilted through the middle of the blocks using the points of the diamonds as a guide. Then I quilted the second and fourth lines trying to get them equally between the other lines.


I added a sparkly green cord around the earth and below the letters at the bottom and above the letters at the top and I hand sewed some blue bugle beads in the four corners and also on the left and right sides of the globe.

More about What I Stand On Is What I Stand For.

= = =

Click on any of the photos to see larger images.

To read more about Project Quilting, go here.

To see other entries for this challenge, visit the Mining for Diamonds page.


Thursday, February 3, 2022

Magic Wand - Project Quilting

 
"Magic Wand," 19" x 13", made by Pam Geisel for Project Quilting, Season 13, Challenge 3: Kitchen Influence

Recap for "Kitchen Influence":

Use food and cooking as your inspiration.

I had several ideas for this week's challenge but what I settled on was soap bubbles. You know, from washing dishes after cooking. We don't have a dishwasher, and we're fine with that. It's just the two of us and we wash the dishes after every meal, so washing them is usually a quick chore. And sometimes I enjoy washing dishes because of the soap bubbles.


First I picked a multicolored batik fabric that had some interesting color patterns in it. I used my circle template ruler to find the spots that I wanted to use then ironed some fusible in that spot and then cut the circles out. I love this circle template and I use it often.


As you can see, I picked spots all over this piece of fabric. I don't really like doing this as I feel it's wasteful of the fabric but occasionally I find it's worth it.


I made some bubble letters. When using fusible to make letters you want to trace them backwards. (If you can't read backwards or 'backwords', the letters spell out SHARE MAGIC.) So not a problem for the A, H, I, and M but it will make a difference with the other letters. I fused them on this fun batik print. I do like the swirly lines but I didn't want them to distract from the letters so I placed the letters to avoid the swirls. The little yellow dots on the blue background reminded me of fireflies.


I fused the letters to the circles then fused them to this background fabric, a piece of hand dyed fabric that was mostly blue but you could see some other colors in it. They look a little lonely so I decided to add a bubble wand and some sheer circles as additional bubbles. Fusing sheer fabric is difficult (and if you get it the iron too hot the sheer will melt) so I pinned them in place. There were a lot of pins in it so I didn't take a photo of this stage.


I used a shiny, variegated thread to quilt around the bubbles and some free motion quilting on the background between the bubbles.


I off set some sheer circles on top of the fabric circles so when I quilted the edge of the sheer it would catch part of the letters.


Here's a side view.

More about Magic Wand.

= = =

Click on any of the photos to see larger images.

To read more about Project Quilting, go here.

To see other entries for this challenge, visit the Kitchen Influence page.