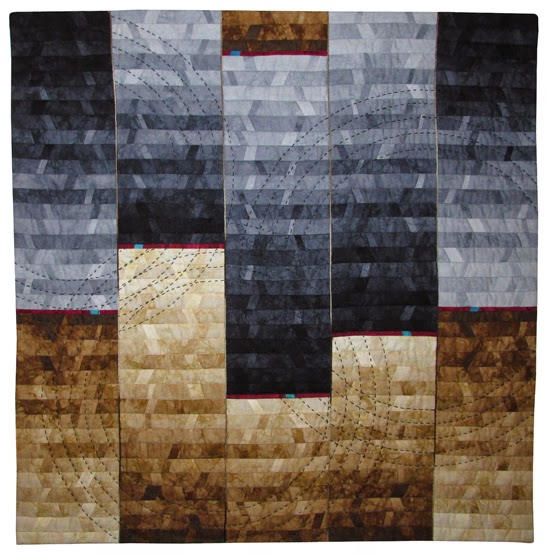
This art quilt began it's life as a completely different idea that I'd already purchased the hand-dyed fabric for. My test samples for the original idea just weren't working so I decided to create something using the 8-steps of gray and 6-steps of brown fabric that were purchased as fat eighths (9" x 22").
I decided to do something similar to my
"Early Morning Nine Patch" and
"Four Patch Bridge at Sunset" but without a representational object. I like the five-column format on these two art quilts, so I started by calculating how many 1" (finished size) strips of each fabric I would have to figure out how high the quilt would be.
Since I would be able to cut more than 5 strips from each fabric (to have 1 per column), I decided to change the pattern to this:
1 - 2 - 1 - 2 - 3 - 2 - 3 - 4 - 3 - 4 - 5 - 4 - 5 - 6 - 5 - 6
By doing this it would also make the quilt 2.5 times taller than if I just went 1 - 2 - 3 - 4 - 5 - 6. I did have to print out a sheet with the steps on it to reference while I was pieceing, so I would get the right strip in the right place.
Next I did some sample layouts on the computer:
With the darker strips at the top and the bottom.
With the darker strips at the bottom.
With the 2nd and 4th columns inverted.
With the middle column inverted and the meeting points staggered.
Now it was time to piece!
I added two inset pieces to each of the 180 horizontal strips, with one of insets being one step darker and one being one step lighter. I did this to add visual texture.
To add just a pop of color, I added a thin strip of maroon fabric with a small inset piece of turquoise fabric where the brown and gray fabrics met. To keep everything lined up, the darker piece next to the maroon pieces is thinner than the other horizontal pieces. I also added a variegated yarn couched between the five columns.
I machine quilted sticth-in-the-ditch to hold it all together and used a knife-edge binding. The final step was to add the three large hand-quilted circles comprised of five ripples each. I really wanted this to stand out so I used a thick embroidery thread. There were some places where I was sewing through as many as six layers of fabric, so I kept my needlenose pliers nearby to help pull the needle through.
In order to keep the shape of the circle, I created circles made of dotted lines on my computer at the sizes I wanted them. I tile printed them onto letter-size card stock then taped the card stock together. I hand quilted the largest circles first, cut away the template to the next sized circle then quilted it. I tried to keep the stitches the same width as the dotted lines to keep everything consistent.


