

"Taking Flight," 10" x 10" x 8", made by Pam Geisel for Project Quilting, Season 11, Challenge 4: Birds in the Air, Feb. 2020 in Yellow Springs, Ohio

Challenge recap for "Birds in the Air":
You must either use or reinterpret the traditional block "Birds in the Air" at least once somewhere in this week’s project.
In traditional quilt blocks, birds are often represented with triangles such as "Flying Geese" and "Birds in the Air" and I've made plenty of art quilts with interpretations of both. One in particular was "Sometimes I Dream of Flying" which I made during the second season of Project Quilting where I used "Birds in the Air" blocks across the top and bottom of the pieces.
For the current challenge, I spent some time thinking and drawing sketches but nothing was really jumping out at me. Then it occurred to me to interpret it in three dimensions and not include the negative space (the white parts in the small illustrations above).
For those of you who know me well, I don't really like making three dimensional pieces, even though I've made some including "Inside of a Dog" and "How Does Your Rainbow Grow." I tried to talk myself out of doing this idea but I really couldn't.

I started auditioning fabrics and the second piece I picked up was this one. I don't know anything about this: who designed it, who printed it, or how I got it. But I did have just enough (the small rectangle at the bottom right is all I have left of it.

To make this piece I sewed the red cord to some triangles cut from heavy fusible interfacing (specifically Pellon Fuse-N-Shape).

Then I fused the fabric triangles to both sides of the interfacing and did a red satin stitch around the edges. The triangle on the left has a longer cord because it goes in the middle and hangs lower than the other four.

I sewed the red cord to the larger triangles which I cut in half so they'd fold better. For the long hanging cord at the top I used a zigzag stitch to attach the cord to the side of one triangle. I did the same for the small triangle that had a longer cord.

Then I abutted the left and right part of the larger triangles leaving a little gap between them, fused the large fabric triangle fabrics to both sides, and did a red satin stitch around the edges.
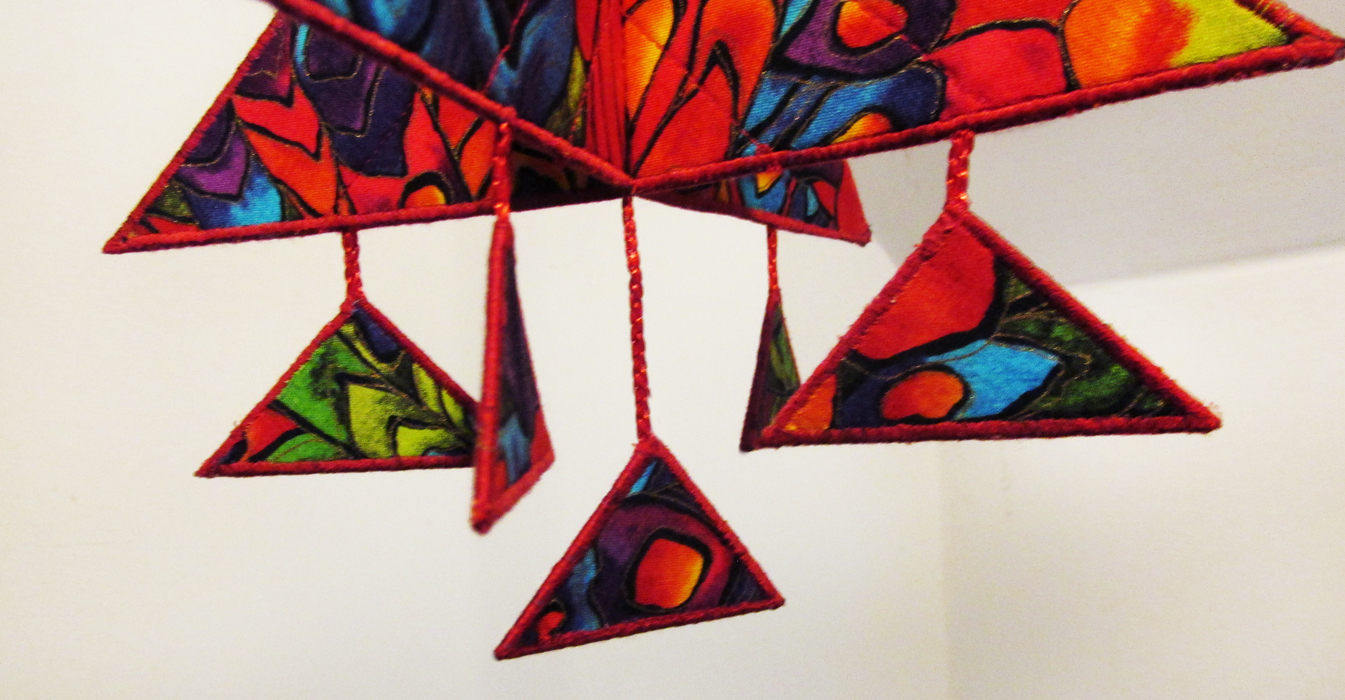
The final step was to lay the two large triangles on top of each other and sew down the middle to attach them. I did use an iron to persuade them into the shape that I wanted.

More about Taking Flight
= = =
Click on any of the photos to see larger images.
To read more about Project Quilting, go here.
To see other entries for this challenge, visit the Birds in the Air page.
1 comment:
Thanks for sharing your process about creating this unique piece for Project QUILTING!!
Post a Comment